

Rebuilding a salvage vehicle is an exciting and rewarding endeavor that requires careful planning and execution. Whether you’re a seasoned mechanic or a passionate DIYer, the process of restoring a damaged car can be both challenging and fulfilling. This article aims to guide you through the essential steps needed to rebuild a salvage vehicle successfully, ensuring you turn a wreck into a roadworthy asset.
First and foremost, it’s crucial to assess the extent of the damage before diving into the rebuild process. Thoroughly inspecting the vehicle allows you to identify key areas that require attention, including structural integrity, engine condition, and electrical systems. Consider creating a detailed checklist to help you prioritize tasks and allocate your budget effectively.
Next, securing the necessary parts and materials is vital for a successful rebuild. Depending on the condition of the vehicle, you may need to source OEM parts, aftermarket upgrades, or even salvage components from other vehicles. Building a rapport with local auto parts suppliers and exploring online marketplaces can be beneficial in finding the right parts at competitive prices.
Finally, patience and perseverance are essential qualities when undertaking a salvage vehicle rebuild. The process may involve countless hours of labor and unexpected challenges along the way, but the satisfaction of seeing your restored vehicle hit the road will make it all worthwhile. By following these steps, you’ll be well on your way to transforming a salvage vehicle into a functional and aesthetically pleasing automobile.
Assessing the Damage and Evaluating Repair Costs
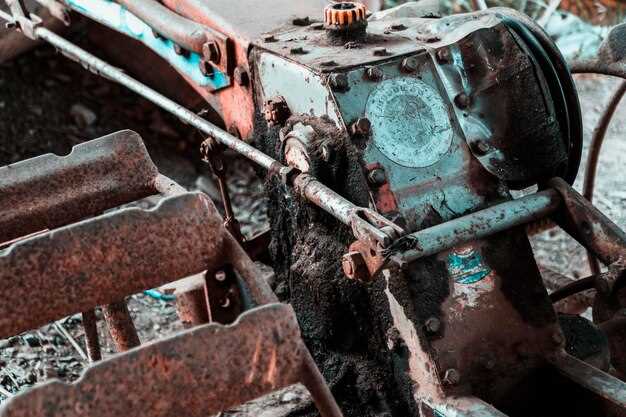
Assessing the damage of a salvage vehicle is a critical first step in the rebuilding process. Begin by conducting a thorough inspection of the vehicle, both externally and internally. Look for body damage, structural integrity issues, and any signs of rust or corrosion. Check the condition of the engine, transmission, and other vital components. This initial evaluation helps identify what needs to be repaired or replaced.
Next, it’s essential to document all damage with photographs and detailed notes. This documentation will help in estimating costs and can be useful if you decide to resell the vehicle later. Once you have a clear understanding of the vehicle’s condition, begin to research the costs of necessary parts and labor. Use online resources, salvage yards, and local repair shops to gather price estimates.
When evaluating repair costs, consider both OEM (Original Equipment Manufacturer) and aftermarket parts. OEM parts tend to be more expensive but may offer better reliability and a proper fit. Aftermarket parts can provide significant savings but ensure they meet quality standards. Factor in additional expenditures such as tools, equipment rentals, and potential consultations with professionals.
It’s also wise to create a detailed budget that outlines all anticipated expenses. Include a contingency fund for unexpected repairs that may arise once the vehicle is disassembled. Prioritize essential repairs that impact safety and operational functionality over cosmetic enhancements.
In summary, thoroughly assessing damage and carefully evaluating repair costs form the foundation of a successful salvage vehicle rebuilding process. By being meticulous and methodical, you can make informed decisions that will lead to a rewarding restoration project.
Obtaining Necessary Parts and Resources for the Rebuild
Successfully rebuilding a salvage vehicle heavily relies on sourcing the right parts and resources. The first step in this process is to identify the specific components needed for the repair. A thorough assessment of the vehicle’s condition will help prioritize parts based on severity and availability.
Utilizing online platforms is crucial for finding original equipment manufacturer (OEM) parts and high-quality aftermarket options. Websites such as eBay, Car-Part.com, and specialized salvage yards can provide access to a wide range of components. Creating a parts list will streamline your search and ensure that you do not overlook any essential items.
Local junkyards represent another valuable resource. Visiting these facilities allows for in-person inspection of parts, ensuring they meet quality standards before purchase. Developing relationships with salvage yard owners can also lead to discounts or notifications about incoming inventory that matches your needs.
Networking with fellow car enthusiasts and rebuilders can yield recommendations and insights into reliable suppliers. Joining online forums or social media groups dedicated to vehicle restoration can help you connect with others who may have spare parts or know where to find them.
In some situations, obtaining specific parts may require customization or fabrication. Engaging with local machine shops or auto body specialists can facilitate this process. They can assist in creating custom components or modifying existing ones to ensure proper fit and function.
Lastly, don’t overlook the importance of tools and equipment in your rebuild. Depending on the extent of the repairs, you may need specialized tools such as welding equipment, diagnostic scanners, and lifts. Assess your toolkit and consider renting or borrowing tools if they’re not already on hand, as this can save time and money during the rebuild process.
Step-by-Step Guide to Rebuilding and Testing the Vehicle

The first step in the process of rebuilding a salvage vehicle is to perform a thorough inspection. Assess the damage to determine the scope of repairs needed. This includes checking the frame, engine, transmission, electrical systems, and body. Document all findings with photos and notes to track your progress and plan for necessary parts.
Once you have a clear understanding of the condition of the vehicle, begin compiling a list of necessary replacement parts. Source components from reputable suppliers or salvage yards to ensure quality. When purchasing parts, verify compatibility with your vehicle’s make and model to avoid additional issues later in the process.
Next, develop a detailed plan and timeline for the rebuild. Breaking the project into smaller tasks can make it more manageable. Create a checklist to ensure all aspects of the rebuild are covered, from mechanical repairs to bodywork. Prioritize tasks based on complexity and importance, tackling critical repairs first.
Begin the rebuild process by addressing mechanical and structural repairs. Start with the engine and transmission, followed by the braking and suspension systems. Ensure that all repairs are completed to manufacturer specifications, and take care to inspect each system as you go along to confirm proper functionality.
After mechanical work is complete, move on to body repairs. This could involve straightening bent panels, replacing damaged sections, or repainting the exterior. Pay attention to alignment and ensure that doors, hoods, and trunk lids open and close properly. Finish with any interior repairs, making the vehicle comfortable and safe for occupants.
Upon completing the rebuild, it is essential to test the vehicle comprehensively. Start with a visual inspection to check for any leaks or irregularities. Next, conduct a series of tests, including starting the engine, assessing the braking system, and evaluating the steering and handling. Pay attention to any unusual noises or warning lights during these tests.
Once initial tests are successful, take the vehicle for a short drive in a controlled environment. Evaluate its performance under various conditions. Monitor the engine temperature, oil pressure, and any vibrations. After thorough testing, ensure that all systems function correctly before considering the vehicle roadworthy.
Finally, if everything checks out, it is advisable to have the vehicle inspected by a professional mechanic. Their expertise can uncover any potential issues that might have been overlooked. Upon passing inspection, the vehicle will be ready for registration and use.


